
Showing posts with label Wizards of the Coast. Show all posts

Sunday, November 22, 2020

D&D Miniatures Portal

Dungeons & Dragons might not come up much these days as a full-scale wargame, but there's going to be quite a bit of it on this site.

From Battlesystem to the Miniatures Handbook, through to Attack Wing and straight up home-brew tomfoolery, D&D has always provided a sort of baseline for miniatures.

In general, the entries for D&D here on the Iron Seer blog will not be RPG focused.  Rather, they will be focused on the spectacle of the miniatures contest itself.  For RPG-related material, check out the RAWRPG section of the site.

The dungeon is just as much a warzone as many of the other locales we'll visit together.  Time to start looking at it that way!


Last Entry: 09/23/18


Sunday, August 2, 2020

It's a Clone War

If you are too careful in the gang, you are not enjoying the gang.
Inspirobot reminds us not to squander what we have.
X-Wing 2.0 seems to have a lot of issues at the present.

I've read about how folks aren't happy with it (competitively speaking) after recent events.  I won't go into any of that now, it's irrelevant.  It is merely an aside that seems to reinforce my recalcitrance to replace all my X-Wing gear with the exact same stuff but different.

My unwillingness to attempt to liquidate all the cardboard and general recalcitrance to buy all new cardboard to replace the other cardboard doesn't mean I'm a fogey who wants to be stuck in the past.  Instead, I think I've come to a happy medium regarding X-Wing.

For me, the Galactic Civil War will be where most of my current gaming lies.  All those TIE fighters, X-Wings and such...I'm not going to try to update 75+ fighters per team.  By the time I'm done collecting all that, it would be time to trade in the chips for a 3rd asinine edition.  X-Wing 1.0 is a great game though, so we'll just leave that there.

For 2.0...I had thought, well, let's do the Clone Wars.  They didn't release any Clone Wars era ships in 1.0...not with "Republic" stamped on it, anyway.  Certainly, they didn't release and CIS droid ships.  So, it only makes sense to move forward with the new edition, in an entirely new theater.  Basically, it will be a totally different game to me.

For the same price it would take to upgrade one of my factions (maybe) I can pretty much pick up the rules and both faction starters for CIS and Republic.  That doesn't give me such willies, honestly...considering it will be a good handful of totally new ships.  That's kind of exciting.

Yeah...but I'm not going to do that.  

2.0 and Star Wars in general seems - dead.  At least in my part of the woods.  The move to 2.0 absolutely destroyed the 'scene'.  The last movies pretty much guaranteed that everyone has a bad taste in their mouth now, all by themselves.  Throw in a pointless change to a new system requiring everything to be bought again and...well, the worst part is this is well before COVID came along and shut everything else down.

What seemed so awesome a few years ago has lost it's lustre.  All the potential for returning Star Wars to a dominant setting used in games everywhere has been terminated.  I guess that's what happens when every company involved decides to metaphorically shoot themselves in the head.

For now, I'm hunting down the last few 1.0 ships I don't already have.  A TIE Defender and Shadow Caster is on the way here now, via some Ebay.  There's only about three more from the entire 1.0 run that has eluded me so far, so that's something.  Besides, if I really want some clone fighters and jedi ships I can always fire up Photoshop and make something nice for myself.  

Sunday, July 5, 2020

Reaper Bones Crates & Barrels

Reaper Bones Crates & Barrels (and Stuff)
Everyone needs some old sacks, boxes and creaky barrels.

I've had these for a minute, but finally sat down and painted some wood.  These came from Bones Kickstarter II,  so it's been a few years.  Hopefully in a few more years, I'll have all this stuff painted.  I need to hurry, because Bones IV will be here in a quick minute.

These were pretty easy and quick.  I used GameColor Charred Brown as a base, painted directly onto the Bones material.  After that, Secret Weapon Heavy Body Black filled in the grain, and I used an un-named brown that I had used on Reaper Cemetery Gates.

Crates & Barrels (and Stuff)
This is where we keep the booty...the PIRATE booty.

Since this collection isn't for any game in particular, I added some bits together to make some more pieces.  The barrel is from some Warhammer set...not sure on that one, maybe the plastic giant?  The other pieces are from Warmachine, I think they came in the Mercenaries Heavy Warjack kit.

Either way, they make great Objective Markers.

I swear, I heard someone peeing out here by the gunpowder...

Sunday, February 10, 2019

Dungeon Tiles and What to Do With Them

Dungeon Tile Boxes
Stacks upon stacks upon stacks...
A few years back, we piled up every Dungeon Tiles box we could stomach and decided to hoard them.  Well, let's be honest - it was more than a few years ago.  It's been so long I don't even know which sets are what anymore and just kinda keep them in a few general containers.

It turns out there were a lot more of these Dungeon Tiles map packs than I thought.  I didn't really think too much of them, wielding my trusty Chessex mats as I did, with my hand-drawn dungeon corridors.  I think I have those somewhere, lingering still.

Dungeon Tiles Boxes
You're gonna need more boxes...
Anyway, check out DM David's (no relation) list and gallery of Dungeon Tiles publications.  It will help you track the rest down if you already have a good idea what pieces you have.  I don't really have that luxury, however.

I think it would take more time than I'm willing to invest at this point to go through these boxes and try to find each set that each piece came from.  Members of the old club would grab these up cheap and drop them in the boxes all the time, and that resulted in very little record keeping.  Such were the times in the old and lawless lands of long ago.

Dungeon Tiles City Plaza Setup
Dungeon Tiles Sewer Entrance

I shall catalog that folly.

Dungeon Tiles City Plaza Setup
Dungeon Tiles City & Sewer Setup

These are pretty much all we really need, though.  Basically, we have three huge sets now:  City, Dungeon and Wilderness.  With the reverse sides, we get some sewers and caverns.  All good stuffs.

Dungeon Tiles with Cave


Nominally, these are for RPG games.  I think we've used them more for skirmish gaming than anything else.  We've used them for campaigns in Warmachine, Mordheim, Frostgrave, Lord of the Rings and even D&D Miniatures.  It's great for claustrophobic settings, and can even allow from transition from a wider board to the interior just by adding some more model terrain.

Dungeon Tiles Wilderness Setup
"What's up fellas?  You wanna get in here by the fire?  It's cold out, but...oh."
I'm not really a fan of the wilderness tiles, as we have a table and actual terrain for all that.  However, if space / transportation is an issue then these provide the perfect solution for the prepared Master of Dungeons.  It certainly makes it easier to whip out small rpg-style scenarios quickly with a good spread of terrain.

Now, I don't have a full on dungeon table (yet) but these tiles fix that wagon pretty good and I'm happy that the old gang decided to invest in them.  We'll be cleaning the Iron Seer's dungeon this season, and air the dank place out.  We'll be looking for various dungeon gubbinz and getting them cataloged, cased and ready for a grand reopening of the place very soon.

Sunday, January 20, 2019

Edge of the Empire Player Characters

Edge of the Empire Player Characters
Our current crew!
WotC Miniatures Left to Right:  Devaronian Soldier, HK-50 Assassin Droid, Corellian Pirate, Twi-lek Scoundrel
I recently acquired some old Star Wars Miniatures for our Edge of the Empire campaign.  No particular reason, I just like to use Star Wars Miniatures for Star Wars games.  I mean I use non-Star Wars Miniatures for Star Wars games also, but I specifically collect Star Wars Miniatures for Star Wars games.  Is that enough keywords, Google?

Edge of the Empire Player Characters
WotC Miniatures Left to Right: Twi-lek Black Sun Vigo, Mission Vao
Anyway, it turns out that some of these are the most expensive collectible prepaints I've bought to date, weighing in at around the $5-20USD on the secondary market.  Mission Vao and the HK droid specifically were pretty expensive, but I typically don't spend more than a few bucks each on prepaints.  It's not bad though, and with Star Wars Miniatures it's one of the only ways to get an official model of certain characters.  I know I need to pickup some lightsaber wielders soon...and some clones.  We'll see how far I actually go down that rabbit hole once I've tracked down all the Attack Wing and X-Wing 1.0 stuff.

I thought it would be cool to kit out our team as a Rogue Stars unit!  A team of Pirates, aggressive and to the point.  The Hard to Kill tactical discipline and the Difficult Target traits will make this team an annoying and dangerous foe, just like our group.  However, two of our players had to bug out during the campaign, so I let their characters take a vacation.

Anyone can use this team in Rogue Star Wars!  Just in case anyone wanted to rough some stuff up, our merry pirate band can fight any other team.  Even other scum.  ESPECIALLY other scum.


Mayhem, Inc. (Pirates)
Hard to Kill

  • Rokka Reer, Twi-lek Entertainer (50)
    • Difficult Target (2), Fast (2), Fire into Melee, Free Disengage, Perceptive (2), Reactive
    • Sonic Pistol, Knife, Kevlar Jacket
  • X, Devaronian Scout (49)
    • Agile (2), Alert, Danger Sense, Difficult Target (2), Marksman (2), Stealth (2)
    • Laser Rifle, Knife, Kevlar Jacket
  • B3-T5Y, Combat Droid (50)
    • Artificial, Nonreactive, Difficult Target (2), Steadfast (1), Tough (1)
    • Laser Rifle, Force Glaive, Light Combat Dress
  • Modo Phloid, Thief from Outer Space (50)
    • Alert, Difficult Target (2), Fire into Melee, Free Disengage, Stealth (2)
    • Laser Rifle, Knife, Kevlar Jacket, 3 Stun Grenades


Sunday, November 18, 2018

Nether War: Nether Peak

Dungeons & Dragons: The Nether War
The Zhentarim is your family. 
You watch out for it, and it watches out for you.
Nether Warriors!

The feeble armies of the Enclave and Harpers have somehow breached our defenses and lay at the very gates of our Fortress!

The Morueme demand we stand our ground here as long as possible while they crush the enemy's remaining forces.  However, a sizable amount of the enemy army has arrived and press the slopes of Nether Peak!

We are prepared!

The Cult toils in the bowels of the mountain, and Zhentarim rattle their swords in anticipation of the battles on the slopes.  Let the snow run red with the blood of those who would defy us!  For the Morueme!

Tier 4 - Nether Peak

Nether Peak
One of the tallest peaks in the Nether Mountains, this particular summit is the lair of the clan leaders of the Morueme - Krathoxis and Tyloss.  It is well guarded within and without, not only by fanatic Dragon Cultists but hired Zhentarim with a reputation to uphold.
  1. Scenario 1 - The Slopes of Nether Peak
    • D&D Attack Wing, 150 Legion Points
      • Setup: Players setup in opposite corners.  A player's corner is half the board length on each side of the map their corner touches.  Models are deployed up to range 1.
      • Objective: Destroy the Enemy Legion.
      • Resolution: When either player's last miniature is destroyed the battle is over.  The Good player must have at least one Dragon on the board at the end of the game in order to claim victory.
  2. Scenario 2 - The Lair of Krathoxis
    • D&D Miniatures, 150 Point Skirmish
      • Contested Ground
        • The Evil player must spend at least 40 points to include a Blue Dragon of any kind.
  3. Scenario 3 - The Upper Slopes
    • D&D Attack Wing, 175 Legion Points
      • Setup: Players deploy up to Range 1 from their table edge.  Place an Objective Token in the center of the board, then both players may place an Objective Token anywhere in their own deployment zone.  Only ground units may be deployed at the start of the game due to the high winds (no dragons or other flying units on the  ground).  At the end of each of their turns, a player may place a new unit on the board near one of the Objective Markers.  To determine which, that player rolls an Attack Die - if a [HIT] or [CRITICAL HIT] is rolled, the player may deploy a unit within Range 1 of the center Objective Token, otherwise they must deploy within Range 1 of the token in their own deployment zone.
      • Objective:  Destroy the Enemy Legion.  
      • Resolution: When either player's last miniature is destroyed the battle is over.  The Good player must have at least one Dragon on the board at the end of the game in order to claim victory.
  4. Scenario 4 - Tyloss' Den
    • D&D Miniatures, 200 Point Skirmish
      • Marked for Death
        • The Evil player must spend at least 40 points to include a Blue Dragon of any kind.  In addition, this dragon must be one marked for death at the beginning of the game and counts as the Evil player's 'choice'.  In addition, Good player must choose a Commander from his force to be marked at the beginning of the game as normal, but must disclose this choice to his opponent.  The other two models to be marked for death are chosen normally.
  5. Scenario 5 - The Summit
    • D&D Attack Wing, 200 Legion Points
      • Setup: Standard.
      • Objective: Destroy the Enemy Legion.  
      • Resolution: When either player's last miniature is destroyed the battle is over.   The Good player must have at least one Dragon on the table at the end of the game to claim victory.
When this base is cleared, the campaign is over and the Good player has won!

Total Points Campaign Narrative
1 to 3 The leadership of the Morueme has been denied to the enemy army.
The Cult and the Zhentarim are forced to retreat, but they are still strong.
5 to 11 Word has spread of our victory, and we draw more noble warriors to our side.
The Cult has lost their will to fight, and the Zhentarim have withdrawn.
12-18 The borders of the goodly folk of the Realms are strengthened!
Victory here has brought forth a new brace of hope over the land.
19 to 26 The banners of the Realms' defenders rise over the settlements of the Sword Coast.
The enemies of the goodly factions flee to the east as fast as they can...
27+ The Harper Network and a resurgence of druidic faiths follow the turning of the Morueme armies.
Throughout these realms, the Harpers and agents of the Enclave work to maintain the fragile peace.
A new call to adventure rises as warriors are called to defend the frontier.

Sunday, October 14, 2018

Nether War: Shadowtop Cathedral

Dungeons & Dragons: The Nether War
Harpers live - and die - to keep the balance.
Nether Warriors!

The final battles are soon upon us.

Darkness will descend upon the Sword Coast if the dragon's plans are not stopped.  If they are allowed to consolidate power in this area of the world, they will find no shortage of recruits for their burgeoning armies.  Tribes of savage humanoids, Uthgardt and other marauders will swell the ranks of the Zhents and the Cult alike.

We are not alone!

The Harpers and Enclave have both gathered their finest troops to defend their Fortress.  We must stop them here, and strike at their heart before they overtake the Sword Coast.  Rally and go forth, brave defenders of freedom in the Realms! 

Tier 4 - Shadowtop Cathedral

Shadowtop Cathedral
Shadowtop Cathedral
The dark army has overpowered the forest's defenders and ploughed a trail to our Fortress.  We must assume treachery and fell sorcery to be at work.  The Emerald Enclave have invited the Harper's warriors to one of their most important meeting places, and the reinforcements have arrived none too soon...
  1. Scenario 1 - Shadowtop Canopy
    • D&D Attack Wing, 150 Legion Points
      • Setup: Standard.  No flying unit may attack any ground unit without landing, nor can they be attacked by ground units.
      • Objective: Destroy the Enemy Legion.
      • Resolution: When either player's last miniature is destroyed the battle is over.  The Evil player must have at least one Dragon on the board at the end of the game in order to claim victory.
  2. Scenario 2 - The Seer's Retreat
    • D&D Miniatures, 150 Point Skirmish
      • Misty Ruins
        • The Good player must spend at least 75 points to include an Emerald Enclave spellcaster and any number of beasts, animals or fey.
  3. Scenario 3 - The Emerald Grove
    • Standard D&D Attack Wing, 175 Legion Points
      • Setup:  Place an Objective Token in the center of the board.  Each player then places an Objective Token up to Range 1 of his own board edge.
      • Objective:  Control the most Objective Tokens at the end of the battle.  You Control an Objective Token if you are the only player with models within Range 1 of the Token.
      • Resolution:  The game ends at the end of any turn in which either player has incurred losses totaling 125 points or more.  Controlling your own Objective Token counts for 1 VP, the center token is worth 2 VP and your opponent's token is worth 3 VP.  The player with the highest VP count at the end of the game is the winner.
  4. Scenario 4 - The Gates of the Cathedral
    • D&D Miniatures, 200 Point Skirmish
      • Life Force
        • The Evil player must spend at least 40 points to include one or more Dragons.
  5. Scenario 5 - The Battle of Shadowtop Cathedral
    • D&D Attack Wing, 200 Legion Points
      • Setup: Standard.
      • Objective: Destroy the Enemy Legion.  
      • Resolution: When either player's last miniature is destroyed the battle is over.   The Evil player must have at least one Dragon on the table at the end of the game to claim victory.
When this base is cleared, the campaign is over and the Evil player has won!

Total Points Evil Victory Narratives
1 to 3 The Emerald Enclave and Harpers have been pushed out of their former territories, yet we are stretched thinly.
Soon, the Harpers will infiltrate our ranks, and the Enclave will seek vengeance, but we will be quite ready...
5 to 11 The Cult and the Zhentarim have managed to turn entire settlements over to our cause.
The Harper presence has been nearly eradicated, and the Enclave have no more strength to fight.
12-18 Much of the north has fallen sway to armies of Cultists and Zhentarim. A darkness descends upon the land...
The Morueme are pleased, and their foes are no threat for the time being.
19 to 26 The tide of terror unleashed by the Morueme is the stuff of legends.
Where no cult or Zhent banners rise, only plumes of smoke and fire mark once thriving settlements.
Now, new enemies will take the place of the old as they witness the horror in lands near their own.
27+ Such is the might of the emerging dragon kingdom that the borders of nations are redrawn.
The Morueme have become the undisputed rulers throughout these Realms, and rule by fear and terror alone.
The new darkness descending upon the land has no end in sight...

Sunday, September 23, 2018

Adventuring Party: Storm King's Thunder

Storm King's Thunder Adventuring Party Miniatures
"Nary a human in sight.  We get discounts for diversity?" - Berry Blessedhammer
So, I've been running Storm King's Thunder for a little over a year.  It's been weekly / bi-weekly to even monthly sessions over that time, as adults our free time waxes and wanes.  In that time I've really gotten into the D&D 5e system and I'm not unhappy with it as a storytelling game.  The game has been fun and light (most of the time) and I decided that since I have three cases of models labeled "Adventurers I-III" I should probably paint some of them.

Some of those cases have painted miniatures already in there, but we'll get to them - eventually.  Since this was an actual adventure party I got to paint, of course it will go in with the Adventurers as a set.  So this will be the first adventure party of what I'm sure will be many - even though historically most player characters don't live very long.  I'll probably take to doing this toward the middle / end of campaigns rather than at the outset!

We'll eventually gallery all the adventurers I've painted, as I'm sure I'll paint a few here and there just to paint them.  Sometimes it will be bands representing actual parties we've got in game and on the table, but sometimes they'll just be a collection of random miniatures that somehow got painted.  They may not all be Player Characters at first, but certainly someday they may be!

For now, check out Storm King's Thunder: Prepare to Die Edition on RAW RPG to find out more about the journeys of the ragtag group of adventurers we are about to meet!

Heroquest Wizard Miniature
"Don't worry about all that fire." - Ikki Popp, to his compatriots.
The Investigator Ikki Popp, Chaotic Good Air Genasi Stone Sorcerer

Hailing from the isles of far Maztica, this intrepid explorer joined the group after seeking out his cousin,  Starman, shortly after arriving in Faerun.  Ikki can control the flow of his spells with incredible magical dexterity, affecting friend and foe only as he desires.  The genasi is also a shapechanger, his form fleeting like the wind.
  • I'm always polite and respectful.
  • Live and Let Live. Ideals aren't worth killing or going to war for.
  • I would still lay down my life for the people I serve with.
  • I have little respect for anyone who is not a proven warrior.
A lot of you will recognize this legendary sculpt.  I wound up with several Heroquest miniatures over the years, even though I don't currently own a copy of the actual game.  This Wizard is literally the first one I've ever painted, and tried to get the feel of the player's character with a grey skin and blue hair...even though the hair isn't quite right...

Balto Burrowell, Gnome Wizard
"ARE YOU MY DAD?!" - Nivesil, to random silver dragons.
The Sage Nivesil, Lawful Good Lightfoot Halfling Dragon-blood Sorcerer

A strange looking halfing, not much is known about Niv other than his name.  A powerful sorcerer with an affinity for cold, he has helped the party out of several bad spots.  Nivesil is currently concerned with finding his father, and his quest takes him in and out of the party's travels.  He's not always around and comes and goes as he is wont, but he is a trusted party member whose raw spellpower is always a welcome asset.
  • There's nothing I like more than a good mystery.
  • Emotions must not cloud our logical thinking.
  • I've been searching my whole life to find the answer to who my father is.
  • I am easily distracted by the promise of information about my father.
Even though I'm the DM, I was under the impression that this character was a gnome for a long time.  I don't know why.  The miniature is a Reaper Bones Balto Burrowell, Gnome Wizard.  Pro-Tip - You can tell gnomes and halfling sculpts apart pretty much only by looking at their feet.

Chainmail Dwarf Legionnaire
"Yo.  I need some ale.  You got some ale?" - Berry Blessedhammer, at every tavern and pub on the road.
The Noble Berry Blessedhammer, Neutral Good Shield Dwarf Paladin of the Ancients

Berry was an esteemed warrior paladin of the Peacekeepers of Icewind Dale. After the deaths of his 2 sons and wife by a sect of demon cultists, he set off south to find the path laid before him by his god Gorm, which apparently includes being heroically drunk almost all the time.  Berry is known through out the Trade Way for his unique brew of ale and a mean left hook.  If you listen, he will tell you that the true power of the Blessedhammers is the unbreakable faith they use to heal and protect the innocent.
  • This world is dark.  Have a pint and pray to the light.
  • I must prove that I can handle myself without the coddling of a temple.
  • I will face any challenge for the greater good of my people.
  • Drunk AF
I enjoyed painting this model.  It's the first Chainmail model I've painted, this one being the Dwarf Legionnaire from Set 1.  Even though it's old it was easy and fun to paint.  The face is probably my favorite, and as I don't really do faces (I usually cheat) it might be the best I've managed to paint of all time...so far.

Reaper Warlord Templar Hospitalier
"I'm going to sing a song about a dear departed friend of mine..." - Starman
The Entertainer Starman, Neutral Air Genasi Cleric of Life

A strange native of Maztica, perhaps it is better to let this servant of the wind goddess Eha speak for himself.

"My tribe of white skinned natives resides on a small island far away. I was born a Genasi, as every three generations of my families House of Eha is to be born. 

My birth was in itself magical. 

I flowed out of my mother like a breeze, an easy and painless birth, I floated out of her womb the size of a teenager with the mentality of an adult. I grew quickly upon the white shores, playing in the ocean using my natural ability to hold my breath indefinitely to search the depths and using my gift of levitation to return easily to the waters surface." 

- Starman on Starman
  • I’ll settle for nothing less than perfection.
  • People. I like seeing the smiles on people’s faces when I perform. That’s all that matters. 
  • I will do anything to prove myself superior to my hated rival.
  • I’ll do anything to win fame and renown.
This model is a Reaper Warlord Crusader Hospitalier.  I got a three pack of these, all different sculpts, and they've all migrated to different projects.  I didn't notice the imperfection in the sculpt of the face until I took pictures of the WIP to show the D&D group, and you can't really see it on the table.  Thumbs up if you see what I'm talking about.

Golan, Male Barbarian
"Are we going to do this the hard way, then?" - Softhands
The Bounty Hunter Softhands, Chaotic Good Tiefling Barbarian Berserker

Originally from the unkind north, by way of Luskan, the tiefling known as Softhands became known as the guy to go to when you need to get things done.  His nickname came about because he let his reputation and subtle intimidation do a lot of the work, once it became known what the alternatives were.  It wasn't long after he met the elf Briar Silverleaf that they left Luskan for the southern Sword Coast, where he continues to ply his trade.
  • Pain is an old friend of mine; I am not afraid of a little suffering.
  • Mind your own affairs and don't boss other people around.
  • The poor and downtrodden are my people. They deserve respect.
  • I find it hard to let someone throw their weight around unchallenged
This is the second model I painted to represent Softhands, the first one being in armor and having a shield.  Like the mix-up with gnomes and halflings earlier, I don't know WHY I thought Softhands must have armor...probably because no monsters could hit him.  The model is a Goldar, Male Barbarian from Reaper Bones with a little green stuff on his head.

Callie, Female Rogue
"We're rich." - Briar Silverleaf, when asked how much hard
currency the party has available at any given time.
The Charlatan Briar Silverleaf, Chaotic Good Wood Elf Arcane Trickster

Originally, this cunning elf-maiden was from the High Forest.  Briar was a successful con-artist in a city of con-artists (Luskan) when she met the bounty hunter Softhands.  They decided to abandon Luskan, which was probably getting a little hot anyway, and as they went south Briar and Softhands met others, and the group formed as they fell into the adventure that is the tale of the Storm King's Thunder.
  • I'm a born gambler and can't resist taking a risk for a potential pay-off.
  • I'm a free spirit - no one tells me what to do.
  • I owe everything to my mentor, who is a horrible person.
  • I'm convinced no one could fool me the way I fool them.
This model, painted by my Lady (the player herself) is Callie, Female Rogue from the Reaper Bones line.  The muted tones look good, and this is one of her first models.  She's painted only a few up until now, and is a lot better than I was when I had a handful of finished models to my name.

Storm King's Thunder Adventuring Party Miniatures 2
Check out the Storm King's Thunder Adventure Log here!

Sunday, September 2, 2018

Nether War: Strongholds of Evil

Dungeons & Dragons: The Nether War
Don't think too much about your orders
...a Harper may hear what you're thinking.
Nether Warriors!

Only the foolish march against the Morueme!

Still, the foolhardy push toward our centers of command.  If you value your lives, you will halt them here!  The war grinds their pathetic armies to dust, so keep these Strongholds defended and functioning in order to avoid...disciplinary action.

Soon the Northern alliance will break, and our armies will overrun the fertile lands they cling to.  A tyranny of dragons will hold sway over the north!  Succeed in holding off their feckless attacks, and you shall be richly rewarded.  Fail and...well, you would do well to not consider the alternative.


Tier 3 - Strongholds of Evil

Estuary Cavern
Estuary Cavern
A Zhentarim operation in the mountains, these caverns provide a convenient barracks to house many soldiers near the base of the Morueme's power.
  1. Scenario 1 - Forward Patrol
    • D&D Attack Wing, 150 Legion Points
      • Setup: Divide the board into four quarters.  The Good player decides which corner he wants to deploy from.  Players may deploy up to range 1 on either edge of the table in their corner. Each player chooses 1 unit to deploy on the board at the start of the game.  At the end of each round after the first, each player may place a new model / unit touching one of their board edges that will act as normal the next round.
      • Objectives: Destroy the enemy's Legion.
      • Resolution: When either player's last miniature is destroyed the game is over.  For each remaining model / unit in the Good player's Legion, the Good Player gets an Momentum Token in Scenario 3.  The Good player must secure at least 2 Momentum tokens in order to win, as well as wiping out the enemy Legion.
  2. Scenario 2 - Blood in the Wood
    • D&D Miniatures, 120 Point Skirmish
      • Stragglers
  3. Scenario 3 - Hold the Line!
    • D&D Attack Wing, 200 Legion Points
      • Setup: Place one Objective Token in the center of the board, and another at Range 1 from the Evil player's board edge.  The Evil player may deploy half his units up to Range 3, while the rest of his units and the Good player may only deploy up to Range 1.  The Good player will have a number of Momentum Tokens allocated from Scenario 1.
      • Objectives: The Evil force must be routed so the Good Legions may secure the area and push them back.  To do this, players earn victory points for each model / unit within Range 2 of the Objectives at the end of the game.
      • Resolution:  Each player receives 1 Victory Point at the end of the game for each model / unit contesting the Objective closest to their board edge and 2 Victory Points for each model / unit contesting the Objective closest to their opponent's board edge.
        • Momentum Tokens:  The Good player will have Momentum Tokens granted from Scenario 1. 
          • A Momentum Token can be spent immediately after a model moves to move an additional [1] Maneuver.  This is a continuance of the model's normal movement.
  4. Scenario 4 - Estuary Cavern
    • D&D Miniatures, 150 Point Skirmish
      • Shattered Ruins
When this base is cleared, the following boons are granted in the next scenarios:
  • D&D Attack Wing - Each model / unit the Good player deployed on the board at the start of the game can make a [1] or [2] Maneuver before the first turn.
  • D&D Miniatures - The Good Player receives 3 Onslaught Tokens at the beginning of the game.  An Onslaught Token can be used during a models' activation to generate a normal attack in addition to any other actions taken by that model.  Only one Onslaught Token can be used by any single model in a turn. 


Dragon's Lair
Dragon's Lair
The Cult of the Dragon maintain a large command camp at the base of the mountain near one of the Morueme's lairs in the foothills.
  1. Scenario 1 - Interlopers!
    • D&D Attack Wing, 150 Legion Points
      • Setup: The Good Legion has been outmaneuvered.  Place an Objective Token in the Center of the Board.  The Good player must deploy his units within Range 2 of this marker.  The Evil player deploys his army in two halves, up to Range 1 from two opposite board edges.
      • Objectives: Destroy the Enemy Legion.
      • Resolution: The battle is over when one side loses models / units equal to 150 Legion Points.  For each unit within Range 1 of the Objective Token at the end of the game, the Good Player gains 1 Conviction Token in Scenario 3.
  2. Scenario 2 - The Dragon's Gate
    • D&D Miniatures, 120 Point Skirmish
      • Tide of Battle
    • Scenario 3 - Fury in the Skies
      • D&D Attack Wing, 200 Legion Points
        • Setup:  Only ground units can be deployed on the table at the beginning of the game, and each Legion must contain at least 1 ground unit.  At the end of the 2nd turn and every turn thereafter, players can place 2 models / units from their Legion touching any board edge they like.  Both of these units will move normally in the next turn.  Players can't deploy again on the same edge in subsequent turns until all their units have deployed, and can't deploy on the same edge an opponent has units touching in this fashion.
        • Objectives: Destroy enemy flying units.  Ground units attacking flying units add 1 Attack Die.
        • Resolution: A player loses the game when they lose all their units capable of flight.
          • Conviction Tokens:  The Good player will have Conviction Tokens granted from Scenario 1.  
            • A Conviction Token may be spent to re-roll any number of Attack Dice when Attacking.  Only ONE Conviction Token can be spent in this manner per turn.
    • Scenario 4 - The Dragon's Lair
      • D&D Miniatures, 150 Point Skirmish
        • Split Warbands
        • The Evil player must include at least one Blue Dragon of any type in his warband.
    When this base is cleared, the following boons are granted in the next scenarios:
    • D&D Attack Wing - At the beginning of the next scenario, the Good Player can choose one type of upgrade category.  For the next game, that category's upgrades cost half the listed price (rounded down) for the Good player's Legion.
    • D&D Miniatures - Dragons have a 20% points cost reduction in the Good Player's Warband for the next scenario.

    Sunday, August 19, 2018

    Nether War: Strongholds of Good

    Dungeons & Dragons: The Nether War
    Never undress in a room with a window
    ...a Harper may be near.
    Nether Warriors!

    The base of your faction's power is here, goodly folk!  The time has come to defend the alliance's main staging areas and leadership centers.  Only the very best of our soldiers will be deployed here.

    Indeed, these battles will be hard fought and bitter.  Beware your enemy's guile when they come to fight here, for it is now late in the war and time grows short for both sides.  Know that your sacrifices here work toward the good and betterment of all, so hold fast your nerves.


    Tier 3 - Strongholds of Good

    Jalanthar
    The Stronghold of the Harpers during the Nether War, the small hamlet of Jalanthar has been reinforced by a small regiment of soldiers.  It has been relatively peaceful until recently, and the enemy will certainly wish to dismantle the support structure here.  Protecting the civilians is paramount if fighting breaks out, and if we are defeated here it will greatly affect the morale of the entire alliance.
    1. Scenario 1 - Approach to Jalanthar
      • D&D Attack Wing, 150 Legion Points
        • Setup:  Standard
        • Objectives:  Place an Objective Token in the center of the board.  The Good player places two Objective Markers anywhere in his deployment zone more than range 3 from another Objective Marker.  These represent strategic points that must be controlled in order to get into the hamlet.
        • Resolution:  The battle is over at the end of any turn when either Legion loses models totaling at least 100 points.  The Evil player must control at least one Objective in order to clear this scenario.  An Objective Token is controlled by a Legion that has a unit within Range 1 of the Token, and no Enemy is within Range 2.  The number of tokens controlled at the end of the game will contribute to the next scenario.
    2. Scenario 2 - In the Dead of Night
      • D&D Miniatures, 120 Point Skirmish
        • Quick Strike (85 point threshold)
    3. Scenario 3 - Assault on Jalanthar
      • D&D Attack Wing, 200 Legion Points
        • Setup: Standard.  This battle takes place high above Jalanthar at night, so only flying creatures can take part in this battle.  For each Objective Marker controlled at the end of Scenario 1, each player gets a 10% bonus to their Legion points.
        • Objectives:  Each player nominates one model as his General.  The game is over when one side loses their General.  
        • Resolution:  At the end of the turn in which a General is killed, count up Victory Points as follows.  Each model destroyed is worth it's total Legion points, and each model with Hit Point damage is worth half.    Models with only damaged Armor are not worth any points.  The General is worth +25 Victory Points.  The side with the highest total wins.
    4. Scenario 4 - Street Fighting
      • D&D Miniatures, 150 Point Skirmish
        • Plunder Run
    When this base is cleared, the following boons are granted in the next scenarios:
    • D&D Attack Wing - The Evil Player receives two No Attack Tokens, which can be assigned to any model / unit at the beginning of the turn at the end of the Manuever phase.
    • D&D Miniatures - The Evil Player may make a Move action with up to half the models in his force at the beginning of the game, just before the first turn.


    Lost Peaks Circle
    The Lost Peaks are rarely traveled by outsiders, due to their remote location and mysterious inhabitants.  It is here that the druids of the Emerald Enclave meet to coordinate with their members all over the North.
    1. Scenario 1 - Scouting the Mountains
      • D&D Attack Wing, 150 Legion Points
        • Setup:  Players can deploy up to Range 2 in opposite corners of the map, up to half the board edge in either direction.  Take 9 Objective Tokens and put them in a pile to the side of the play area.  At the beginning of each Evil player turn, remove an Objective Token from the pile.
        • Objectives:  Divide the map into quadrants.  For each quadrant that contains a unit from the Evil side and no Good models, the Evil player gains 1 VP.  To win the game, the Evil player must score 2 or more VP.  The game is over at the end of the turn when the Evil player removes the last Objective Token.
        • Resolution:  For each VP scored by the Evil player, the Evil force receives one Scout Token during Scenario 3.
    2. Scenario 2 - Ryth's Precipice
      • D&D Miniatures, 120 point Skirmish
        • Reconnaissance in Force
    3. Scenario 3 - Where Dragons Dare
      • D&D Attack Wing, 200 Legion Points
        • Setup:  At the beginning of the game, each player places one model / unit in each of his two corners up to Range 1 from both table edges.  Place an Objective Token in the center of the board, representing the circle of stones.  At the beginning of each subsequent turn, each player can place a unit with it's base touching his table edge.  These models then place their dials during the Maneuver phase as normal.
        • Objectives:  The winner is the player with the most units within Range 2 of the Objective at the end of the game.  In case of a tie, the Good player wins.
        • Resolution:  The game is over when one player loses models equal to 150 Legion Points.
          • Scout Tokens:  The Evil player will have Scout Tokens granted from Scenario 1.  These can be used to either: 
            1. Deploy an additional unit anywhere along the board edge at the start of the game.  Only ONE Scout Token can be spent in this way.
            2. Make a (2) Maneuver at the end of any turn.  Only ONE Scout Token can be spent in this way per turn.
    4. Scenario 4 - Battle at the Circle
      • D&D Miniatures, 150 point Skirmish
        • Magic Statues
    When this base is cleared, the following boons are granted in the next scenarios:
    • D&D Attack Wing - The Evil Player may add or remove 1 Duration Token to any card, model or effect in play.  This may be done once for each instance of each effect.
    • D&D Miniatures - The Evil Player receives 3 Onslaught Tokens at the beginning of the game.  An Onslaught Token can be used during a models' activation to generate a normal attack in addition to any other actions taken by that model.  Only one Onslaught Token can be used by any single model in a turn.

    Sunday, August 5, 2018

    Rogue Star Wars: Bothawui Run

    Bothawui, where rebels yell.
    Planet Bothawui, where it gets cold only sometimes.
    After the close call with the pirates, the Rebel station at the Bothawui polar region was to be evacuated.  They knew it was only a matter of time before the Imperials figured out what was going on and came out to investigate, so the teams quickly moved to evade any so-called 'entanglements'.  After procuring most of the sensitive equipment and data, only a few sections of the base remained to be dismantled.

    Reeling from casualties sustained in the earlier skirmish, the band of rebels attempts to upload a cache of sensitive deployment data to courier ships waiting in orbit.  Already on the way, unbeknownst to the rebels, was a team of Imperial Stormtroopers led there by an independent contractor, an outer rim bounty hunter.  We open as both teams close in on the transmitter...

    All the rebels have to do is establish the uplink and complete the transfer.  The Imperials are inspecting the ruins, and are soon alerted to their presence.  It's a simple thing, to complete the transfer...nought but a few keystrokes.

    BATTLE REPORT
    Rogue Stars by Osprey Publishing

    Rogue Star Wars Campaign 
    Bothawui Rebel Attack on Imperials; Hacking Mission

    Setup
    Rebel Tech-Partisans vs Imperial Hunter-Killer Team

    No complications were used for this match, despite what we were explicitly told to do.  We simply forgot.


    Quickly and quietly, the Rebel team begins its advance back into the ruins...only vaguely aware of the precariousness of the situation.  Imperials weren't immediately expected, but little did they know that a mysterious bounty hunter had tailed the Buru brothers right to the ancient Jedi ruins.  By the time the Rebels had returned from the first phase of the evacuation, the contractor had returned with an Imperial patrol and were already sniffing around the site.
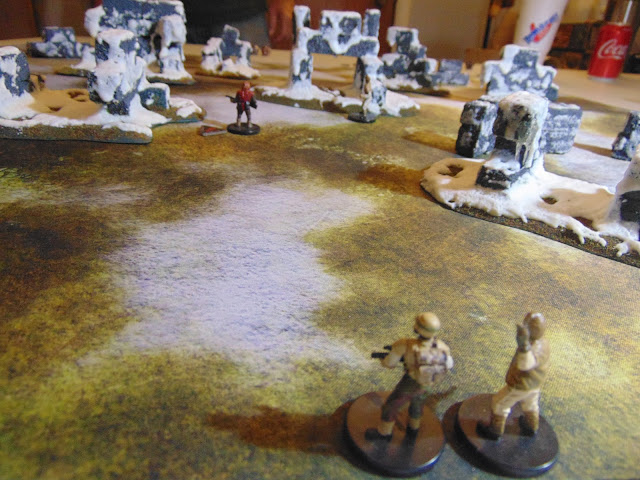
    Bothawui Run 1
    Let's just wait here and see if anyone shoots at them.
    Imperials had the first activations, but were taking their time walking across the treacherous snow and avoiding those TN 8 Terrain rolls.  The Rebel Pathfinder and Bothan Commando took the first reactions to run as fast as they could toward the objective.  For a while, there were no targets in sight for either team.

    Bothawui Run 2
    This looks like a good spot to wait for someone to shoot.
    It takes multiple actions to get anywhere.   At 2" each, you have to spend all 3 from 3 successful dice to get a 6" move.  It's kinda funny that it's more stressful to walk than run, but then I remembered they were walking in ankle deep snow slush over muddy ground.  Still, it's worth indicating that you should probably only walk where it's injurious to do otherwise.

    After all, you could be shot.
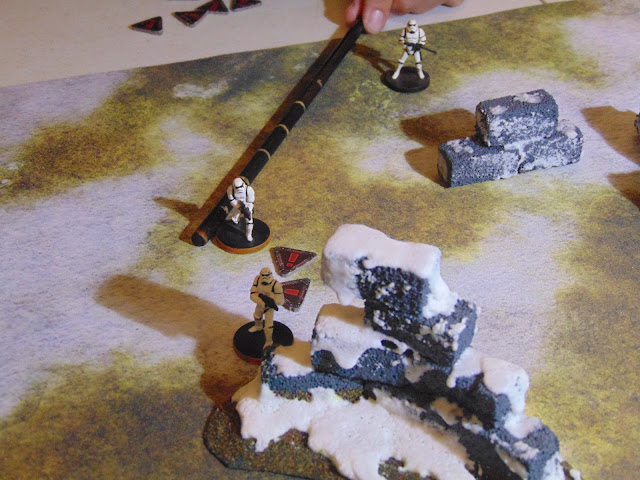
    Bothawui Run 3
    Just take baby steps and you'll be ok.
    The stormtroopers moved to cover the center area of the board, as if they could feel the rebel presence long before they could see it.  Scan-darts should be a thing...but it didn't matter anyway.  The Imperials had Heavy Firepower, and knew how to use it - concentrated on one area.
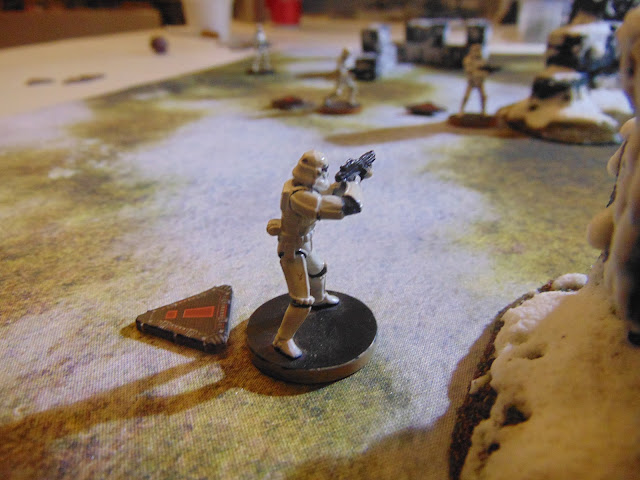
    Bothawui Run 4
    Remember to cover your squadmates during leap-frog advances.  It's just plain rude not to.
    The Rebels made it to the edge of the ruin where the uplink was concealed within the Jedi Temple's architecture.  The advance stalled there when they tried to move more elements up to repel the Imperial fire that was about to pour on the comm-station.  However, the Rebel team was at a pretty strong disadvantage for one reason:  the Rogue Stars campaign system for survival is quite brutal, and the Rebel team was already down two members to four at the outset of the game.

    Bothawui Run 5
    That's not reinforcements but ok...
    Get to the comm-link, spend two actions and make a roll of 15+ on a d20.  That's all they had to do.  Things were going pretty good for the first few rounds of the game...

    Bothawui Run 6
    Hey, let me just plug in this data-spike and we'll begin the upload...
    However, the Imperials were already in key positions overlooking the transmitter.  They must have detected the encrypted signals coming from the transponders hidden in the ancient rock spires.  It was mere seconds before the Imperials sighted movement and began their attack.

    Bothawui Run 7
    PLA-KET-KETT!
    Fire was exchanged in all directions, and second rank guns moved up to take the place of those that went down.

    Bothawui Run 8
    Dammit, Jenkins...get in that hole and press the button!
    After a few harsh rounds of fire using several Imperial Heavy Firepower tokens, two rebels were out of action and a single stormtrooper was stunned.  The Rebel Commando finally got to the scene and immediately began First Aid, owing to how brutal the campaign system is on fighters that go out of action.  Mainly, you're dead most of the time even if you're somehow stabilized.

    Bothawui Run 9
    Uhh...it's not working, sir?  I think it's because Jenkins is dead.
    The Imperials poured on the fire, using the Heavy Firepower discipline until it was gone.  Once the Rebel Pathfinder went down, it was clear this was going to be an uphill climb for the Rebel team.  Still, they pressed forward, determined to get the last datastore uploaded and away from their enemies.

    Bothawui Run 10
    Anyone that runs is a Rebel soldier.  Anyone who doesn't run is a well-disciplined Rebel soldier.
    The last remaining rebels dove for cover but it was no use.  They'd have to take more of the guns out of play.  After weathering the Heavy Firepower, they were already out of position and undermanned, but if they couldn't take out more troopers quickly they'd have to roll the dice on the upload.  The last remaining rebel, the commander, moved up to work the uplink and finish the mission, despite almost 100% casualties.
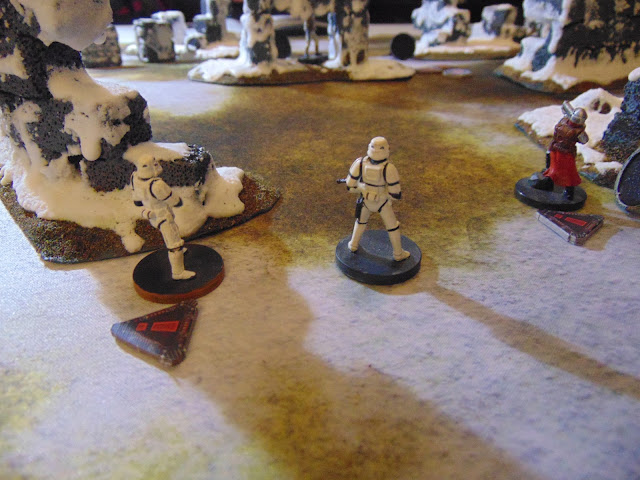
    Bothawui Run 11
    Who needs maneuver when you've got firepower and armor?
    The commander managed a return shot before he was knocked prone.  Several shots from the Imperial fireteam melted the snow where he was lying before he could get the uplink finished as they raked the area with their guns.  They piled on a huge amount of pin tokens during their frantic deluge of blaster fire, as well as 3 wounds.  However, he was successful and punched the code...only to fail to get the thing to truly upload.  With that...the game was over.  The Rebel Commander retreated, leaving the fallen where they were.

    Bothawui Run 12
    We found a large number of pin tokens and a few wounds among the survivors, sir.
    The Imperial team calmly reloaded their weapons after running out of ammunition and resumed firing into the structure.  The structure funneled the rebels right into their fire solution.  They didn't advance until there was no more movement on scanners, and then began searching the ruins for evidence of rebel activity, capturing all of the Rebel team except the captain.